
Tile Waterproofing Methods Explained: What Goes Behind Shower Tile
Compare waterproofing methods for Ontario showers: sheet membranes, foam boards, liquid membranes, cement board systems, and questions to ask.
Key answer
Waterproofing is the system behind the tile
The main tile waterproofing methods for showers are sheet membranes, liquid-applied membranes, foam or waterproof backer board systems, and traditional cement board assemblies that include a separate moisture barrier or membrane. The right choice depends on the shower design, drain, substrate, installer training, and whether the room has details like niches, benches, curbs, or a curbless entry.
Tile and grout create the visible finish, but they should not be treated as the waterproofing plan. Water can reach grout joints, corners, penetrations, and transitions over time, so the shower needs a continuous water-management layer before the tile is installed.
This guide is for homeowners planning a shower tile installation, bathroom renovation, or replacement shower in Waterloo Region and trying to understand what should happen behind the finished surface.
Why shower waterproofing matters before the tile is chosen
A shower is not a dry wall with tile added to it. It is a wet-area assembly. The tile, mortar, grout, silicone, backer, membrane, drain, curb, pan, corners, fasteners, and penetrations all have to work together. If one part of that assembly is weak, the finished tile can still look clean while moisture is moving behind it.
This is why the waterproofing discussion should happen before final layout decisions. A niche changes how seams are treated. A bench adds horizontal surfaces that need slope and protection. A linear drain changes pan planning. Large-format wall tile may look simple, but the surface behind it still needs to be flat, stable, and correctly waterproofed.
For most bathroom tile installations, the most expensive waterproofing mistake is not the membrane material itself. It is unclear scope: nobody confirms the substrate, seams, drain connection, penetrations, or what happens where the shower meets the rest of the room.
Method 1: sheet membranes over a prepared substrate
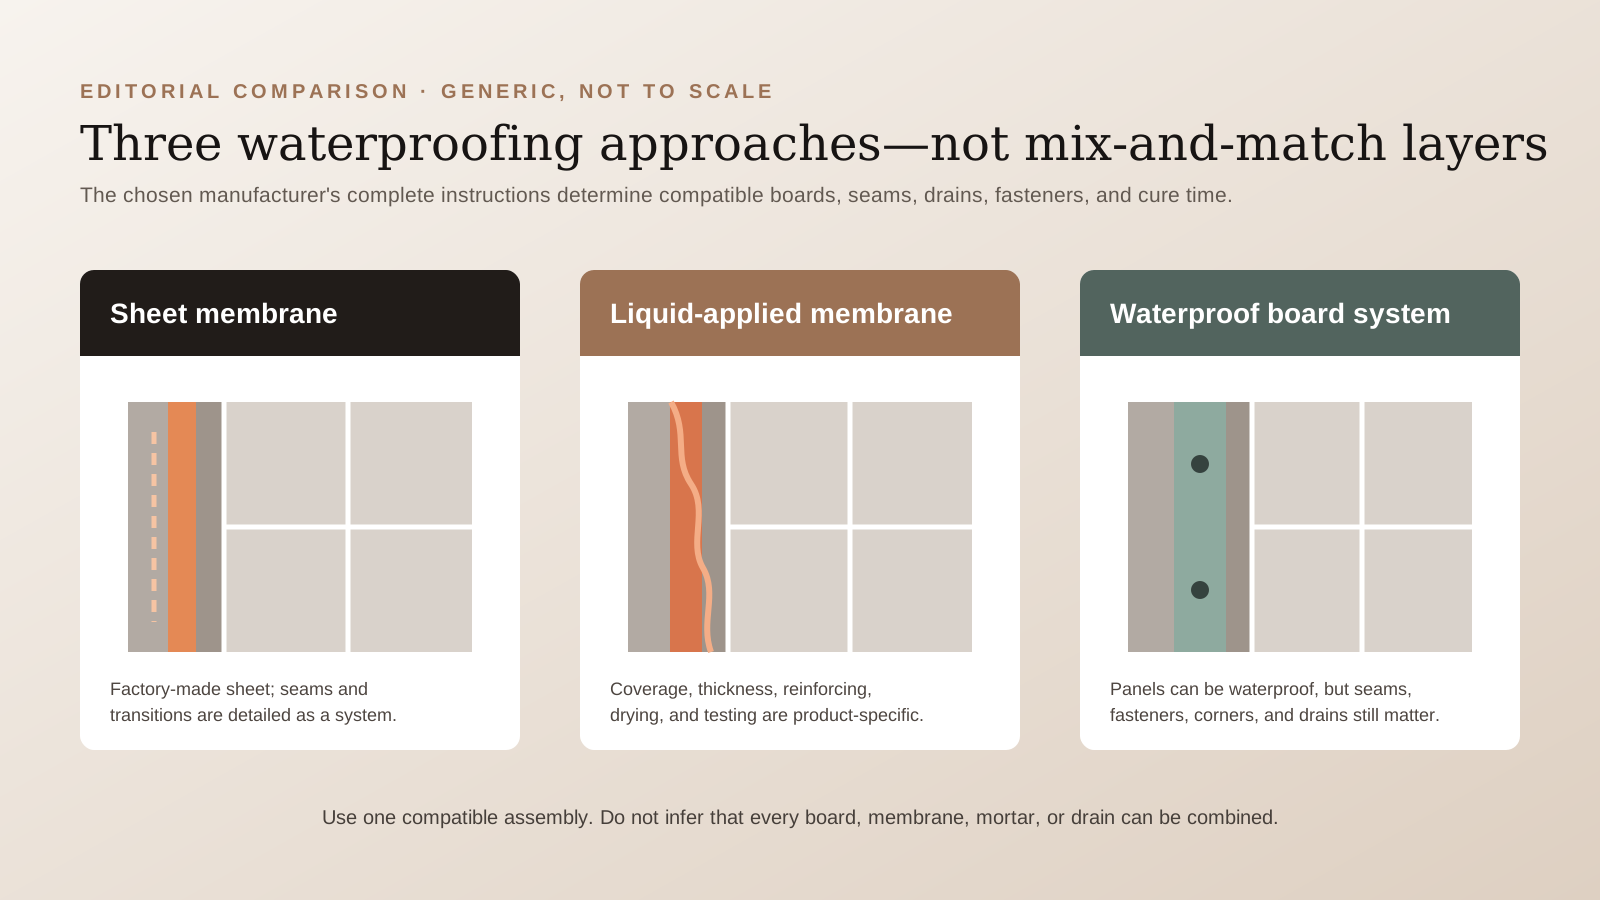
Sheet membranes are thin waterproofing layers bonded to a prepared surface before tile is set. Schluter KERDI is one widely used example; Schluter describes it as a bonded waterproofing and vapor-retardant membrane. In practice, a sheet membrane system is only as good as the seams, overlaps, corners, bands, and drain connection.
This approach is popular because it creates a defined waterproofing plane near the surface of the tile assembly. Instead of relying on a hidden plastic sheet behind cement board, the membrane sits directly behind the tile setting layer, which can make the assembly easier to inspect before tile begins.
The installation caveat is precision. Sheet membranes require careful embedding, proper mortar selection, clean transitions, and manufacturer-specific treatment at inside corners, outside corners, niches, benches, curbs, and drains. Wrinkles, voids, poorly overlapped seams, and rushed drain details can undermine the system.
Method 2: liquid-applied waterproofing membranes
Liquid-applied membranes are rolled, brushed, sprayed, or troweled over an approved substrate and allowed to cure into a continuous waterproofing layer. LATICRETE HYDRO BAN and Custom Building Products RedGard are common examples in North American tile work.
The advantage is flexibility around irregular shapes. A liquid membrane can be practical for benches, niches, corners, and complex surfaces when the installer follows the product requirements for substrate prep, coats, thickness, cure time, and reinforcement where needed.
The risk is that liquid membranes look simple but are easy to under-apply. A coat that is too thin, rushed, contaminated, or not cured correctly is not the same as a tested waterproofing assembly. Good installers pay attention to coverage, drying conditions, corners, drains, and whether the chosen liquid membrane is appropriate for the shower scope.
Method 3: foam board and waterproof backer board systems
Foam board and waterproof backer board systems combine substrate and waterproofing into a panel-based approach. Instead of installing a separate cement board and then waterproofing it, the wall board itself may be designed as part of a wet-area system. The seams, fasteners, washers, corners, and accessories still need to be treated correctly.
These systems can speed up a shower build and reduce weight compared with cement board, especially on walls, benches, and custom features. They are also useful when the installer wants a complete manufacturer system for wall board, pan, curb, niche, drain, and sealing accessories.
The important distinction is that a waterproof board is not automatically a waterproof shower. The panel field may resist water, but every fastener, seam, inside corner, outside corner, curb, transition, valve opening, and drain detail still has to be sealed as part of the system.
Method 4: cement board with a separate waterproofing layer
Cement board is a stable tile substrate, but it should not be confused with a complete waterproofing method on its own. In shower work, cement board is commonly paired with a waterproofing strategy such as a sheet membrane, liquid membrane, or moisture barrier installed as part of the wall assembly.
This method can perform well when the details are handled cleanly. The board must be fastened correctly, seams must be treated, transitions must be planned, and the waterproofing layer must be continuous. It is not enough to install cement board, set tile, and assume the assembly is protected.
For homeowners comparing quotes, this is one of the places where language matters. A quote that says "cement board included" is not the same as a quote that explains the waterproofing method. Ask whether the walls receive a membrane, how seams and corners are treated, and how the pan or drain connects to the wall system.
Which tile waterproofing method is best?
There is no single best waterproofing method for every shower. Sheet membranes are excellent when the installer is precise with seams and drain connections. Liquid membranes are useful for many wet-area details when applied at the correct thickness and allowed to cure. Foam and waterproof board systems can be efficient when the whole shower is planned as one system. Cement board assemblies can work when paired with a proper membrane or moisture barrier.
The better question is: which method is best for this shower, this drain, this tile, this substrate, and this installer? A small tub surround, a full custom shower, a curbless shower, and a steam shower should not be treated as the same scope.
In Waterloo Region homes, we also look at the age of the house, past water damage, framing condition, floor structure, ventilation, and whether previous renovations left uneven or layered substrates behind. Good waterproofing starts with a clear assessment, not a product name.
Details that make or break waterproofing
The most vulnerable areas in a shower are usually not the middle of a flat wall. They are the transitions: wall-to-floor joints, inside corners, curbs, benches, niches, valve openings, shower heads, fasteners, drain connections, and the point where the shower meets the main bathroom floor.
Horizontal surfaces deserve extra attention. Bench tops, niche bottoms, curbs, and pony walls need slope so water moves toward the drain instead of sitting against a corner or glass line. Even a beautiful tile layout can become frustrating if water collects on a flat ledge every day.
Tile size also matters. Large-format wall tile can reduce grout lines, but it still needs a flat wall and thoughtful layout around the waterproofing details. Smaller mosaics often work better on shower floors because they follow slope more easily. For more material planning, see our guide to types of tile for showers.
What to ask before your shower is tiled
Before approving a shower quote, ask what waterproofing method will be used, what substrate it requires, and whether the installer is using one manufacturer system or mixing products. Mixing can be acceptable only when the products and details are compatible; it should never be accidental.
Ask how the drain, corners, niche, bench, curb, and valve penetrations will be treated. Ask what cure times are expected before tile, grout, silicone, and shower use. Ask whether the shower pan will be tested when the scope calls for it, and who is responsible if hidden damage is discovered after demolition.
A clear quote for waterproofing and tile prep should describe more than the finished tile. It should explain the prep assumptions, membrane or board system, vulnerable details, tile setting sequence, and timeline.
Common waterproofing mistakes to avoid
The first mistake is assuming tile and grout solve the water problem. The second is assuming cement board is waterproof by itself. The third is treating a shower niche, bench, curb, or drain as an afterthought after the tile has already been selected.
Another common issue is comparing quotes without comparing assemblies. One quote may include demolition, substrate rebuild, waterproofing, pan work, edge profiles, grout, silicone, and cure time. Another may list only tile setting. Those are not the same job, even if the finished inspiration photo looks identical.
Avoid any plan that cannot explain what happens behind the tile. A premium shower should feel calm on the surface because the hidden work has already been solved.
Ready to plan waterproofing before tile?
Tile waterproofing methods matter because they decide how the shower performs after the new finish is installed. The best choice is not just Kerdi, liquid membrane, foam board, or cement board. The best choice is a complete assembly that fits the room, the drain, the tile, and the details.
Moonka Tiles Co. plans shower tile, bathroom tile, waterproofing prep, and custom tile features across Waterloo Region. If you are replacing an old shower or planning a new bathroom, start the conversation before buying every finish material.
Frequently asked questions
Is tile waterproof enough for a shower?
No. Tile and grout are the visible finish, not the complete waterproofing system. A shower needs a continuous water-management layer behind the tile, especially at seams, corners, drains, curbs, niches, benches, and valve penetrations.
Which shower waterproofing method is best?
The best method depends on the shower design, substrate, drain, tile size, and installer training. Sheet membranes, liquid membranes, foam board systems, and cement board with a proper membrane can all work when installed as a complete, compatible system.
Is cement board waterproof?
Cement board is moisture durable and suitable as a tile substrate, but it is not a complete waterproofing system by itself. In showers, it should be paired with a waterproofing membrane, moisture barrier, or manufacturer-approved wet-area assembly.
Can different waterproofing products be mixed in one shower?
Products should only be mixed when the installer has confirmed compatibility and the detail still follows manufacturer requirements. Randomly combining sheet membranes, liquid membranes, boards, sealants, and drains can create weak transitions or warranty problems.
What should a waterproofing quote include?
A useful quote should identify the substrate, waterproofing method, pan or drain approach, treatment of seams and corners, niche or bench details, cure-time assumptions, exclusions, and what happens if demolition reveals water damage.
Sources and further reading
Technical claims are checked against the following primary or specialist references. Product-specific instructions always take precedence for the assembly being installed.
- Tile Council of North America: shower installation FAQUsed for: System compatibility, shower substrate, membrane, backer-board, and manufacturer-instruction considerations.
- MAPEI Canada: waterproofing membrane systemsUsed for: The distinctions among sheet, liquid-applied, and board-based waterproofing approaches and the need for a continuous compatible system.
- Schluter Systems Canada: water testing a shower systemUsed for: Pre-tile water testing as assembly quality control, with cure time and procedure tied to the installed system.