
Mitred Tile Edges: Where They Work, Where They Chip, and What to Ask
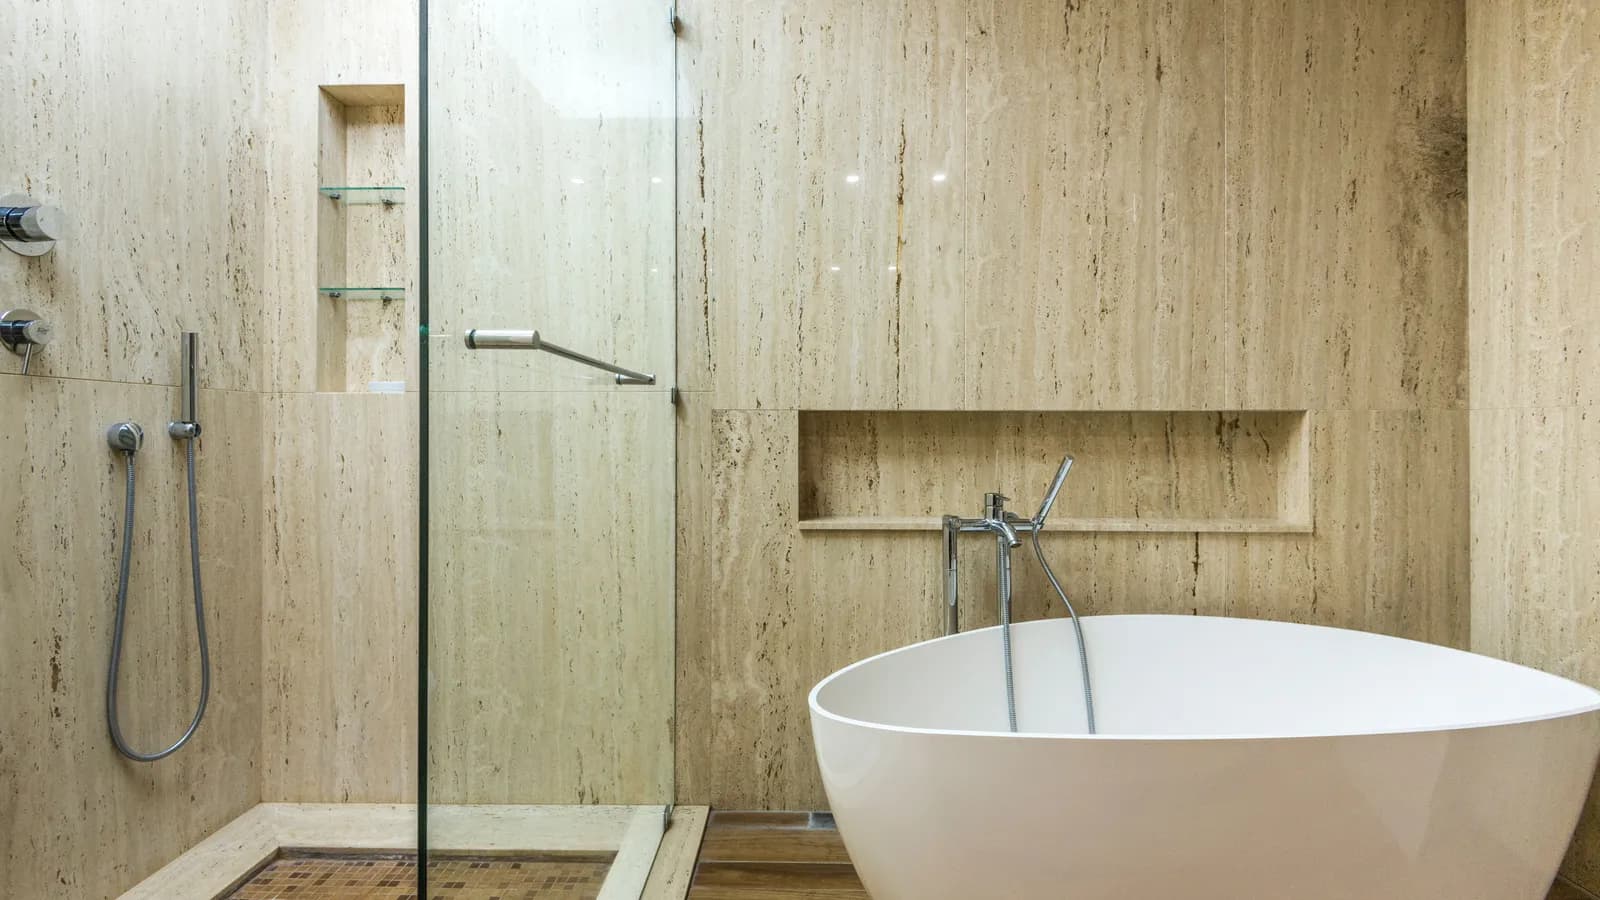
Mitred tile edges give niches, curbs and corners a trim-free finish. Learn which tiles mitre cleanly, where mitres chip, and when bullnose or trim is smarter.
Key answer
A mitred tile edge is a trim-free corner, and the tile decides how well it lasts
Mitred tile edges are outside corners where two tiles are each cut at a 45-degree bevel so their faces meet at the corner, with no bullnose, metal trim, or raw cut edge on show. American sources usually spell it mitered. Done well, a mitre makes a niche, a shower curb, or a wall return look as if it were carved from one solid piece of tile or stone, and it is one of the clearest signs of careful, high-end tile work.
The catch is that a mitre is only as good as the tile and the installer. It works best on through-body or colour-body porcelain and on natural stone, on walls and niches that do not take knocks. On glazed tile with a contrasting body, at floor level, and on edges people brush with bare skin, bullnose or a metal profile is often the better call. There is also no ANSI or TCNA standard that tells an installer how to build a mitre, so methods and results vary widely.
This guide covers what a mitred edge is, which tiles suit it, where it looks best, where it fails, how a good one is made, what it adds to a quote, and what to ask before you approve it. For the broader planning side of detailed tile work, see our custom tile installation service.
What a mitred tile edge is, and what people confuse it with
At an outside corner, two tiled surfaces meet at a right angle and the corner projects into the room. Without a finishing detail, one tile's cut edge or unglazed body would be visible. Installers have three broad ways to deal with that: cover the edge with a trim piece, use a tile that has a finished edge, or bevel both tiles so neither edge shows. The third option is the mitre. Each tile is cut along its edge at 45 degrees, the two bevels meet behind the corner, and the faces wrap around it as one continuous surface.
The word gets used for a few other details, so it helps to be precise when you talk to an installer or designer:
- Mitred outside corner: the subject of this guide. Two tiles bevelled to meet at a corner that sticks out, such as the edge of a niche, a curb, or the end of a wall.
- Mitred border or frame corner: two strips of border tile, or the edges of a picture-frame pattern, cut at 45 degrees where they meet in the same flat plane. It is a layout detail, not an edge treatment.
- Bevelled-edge tile: a factory-made tile, such as a bevelled subway tile, with angled edges that add shadow and texture. It still needs trim or another finish at an outside corner.
- Quirk mitre: a stone-industry term for a mitre whose sharp point is blunted to a small finished face, which makes the corner tougher and less sharp.
Inside corners, where two walls meet in a recess, are not mitred. The tiles are butted, and in most assemblies the change of plane gets a flexible sealant instead of rigid grout so the joint can move. Our guide to how grout choice affects tile installation explains where sealant belongs.
Mitred edges vs bullnose vs metal trim: a quick comparison
| Edge finish | How it looks | Durability at the corner | Labour and planning | Best fit |
|---|---|---|---|---|
| Mitred edge | Seamless. The tile or stone appears to wrap the corner with no trim line. | Good when the point is eased and fully supported. A sharp, unsupported point chips. | Highest. Precise bevel cuts, spare tile for test pieces, and slower setting. | Niches, wall returns, feature walls, and carefully eased curbs and benches in through-body porcelain or stone. |
| Bullnose or finished-edge tile | A rounded or finished edge in the same glaze as the field tile. | Good. A glazed, rounded edge resists chips well. | Low, when the tile collection includes matching pieces. | Traditional and transitional rooms, ceramic wall tile, and practical wet areas. |
| Metal profile | A thin visible line of metal at the corner, in a square, rounded, or angled shape. | Highest. The profile takes impacts instead of the tile edge. | Moderate. Profiles must be ordered in the right height, shape, and finish. | Busy corners, floor edges, glazed tile with a contrasting body, and modern rooms where a metal line suits the design. |
| Manufacturer corner pieces | A one-piece outside corner made to match the tile. | Good. | Low to moderate, but entirely dependent on availability. | Collections that offer them, often ceramic wall tile and some stone. |
| Polished or eased square edge | The tile's own edge is finished and left visible, overlapping the tile on the return. | Fair. Depends on the body colour and how well the edge is finished. | Low to moderate. | Through-body porcelain and stone where a crisp square edge suits the design. |
No option is the premium choice in every room. A mitre gives the cleanest look, a profile gives the toughest corner, and bullnose is often the most sensible finish for a traditional ceramic tile. The right answer depends on the tile, where the edge sits, and how hard the room is used. Many of the best bathrooms mix them: mitred niches at eye level, a profile where the wall meets the floor, and bullnose on a tub deck that takes daily knocks.
Which tiles can be mitred cleanly?
A mitre exposes the inside of the tile along the bevel, so the tile body matters as much as the face. Arizona Tile explains the difference clearly: in glazed porcelain, the colour or pattern exists only in the glaze on the surface; in colour-body porcelain, the body is tinted to match the main surface colour; and in through-body porcelain, the colour and pattern run through the full thickness. That difference becomes visible at a mitred corner, especially once the point is eased or if it ever chips.
| Tile type | How it mitres | What to watch |
|---|---|---|
| Through-body porcelain | Very well. The bevel matches the face, so the corner reads as solid material. | Very hard and dense. It needs a blade made for porcelain and slow, steady cuts. |
| Colour-body porcelain | Well. The surface pattern stops at the bevel, but the body colour stays close to the face. | Printed veining or texture will not continue across the bevel itself. |
| Glazed porcelain or ceramic | Possible, but often disappointing. The body can show as a line along the corner. | The glaze can chip at the point. A sample corner is the only fair test. |
| Marble, limestone, and travertine | Beautifully. Stone wraps a corner with no change in colour. | Softer stones scratch and etch, travertine voids open up at the bevel and need filling, and stone needs a sealing routine. |
| Large porcelain panels | It depends on thickness. Thicker panels mitre more readily than very thin ones. | Specialist cutting, handling, and the panel maker's instructions. |
| Handmade, zellige, glass, and mosaic sheets | Rarely a good fit. | Irregular thickness, glass edges, and sheet joints make clean mitres difficult. A profile or a finished companion piece is usually better. |
Thickness and flatness matter too. Tiles that vary slightly in thickness, or that have a little factory warpage, show it at a mitre, because any difference between the two faces becomes a visible step right at the corner. TileLetter, the magazine of the National Tile Contractors Association, reports that thicker porcelain panels of 8 mm and 12 mm are now being mitred, which opens up slab-look walls and wrapped corners in porcelain as well as stone.
If you already know you want mitred niches or wall returns, choose the tile with that in mind. Ask the showroom whether the tile is glazed, colour-body, or through-body, look at a cut edge, and have a sample corner made before you order the full quantity if you can. Our porcelain vs ceramic tile guide covers how the two materials differ more broadly.
Where mitred tile edges look best
Mitred edges earn their extra time where the eye lands and hands rarely knock. The NTCA Reference Manual, as summarized by TileLetter, lists wall returns, outside corners, curbs, benches, columns, recessed niches, and waterfall edges as the usual places for mitres. In a home, that comes down to a handful of details.
Shower niches. A niche has four outside edges and four three-way corners where the returns meet the wall. Mitring those edges removes the metal frame that often outlines a niche and lets the wall tile fold into the opening. It looks best when the niche is sized to the tile layout, so grout lines run straight into it, and when the sill is pitched slightly toward the shower so water does not sit on it. Our shower tile installation service plans niches together with the waterproofing behind them.
Shower curbs and bench tops. A mitred curb or bench reads as one solid block of porcelain or stone. These are also the edges people step over, sit on, and brush with bare legs, so the point should be eased rather than left knife-sharp, and the top should still slope toward the shower.
Wall returns and half walls. Window returns, pony walls beside a toilet or vanity, and partial shower walls all have exposed ends. Wrapping the tile around them with a mitre makes the wall look built from the material rather than covered in it.
Kitchen backsplash ends. Where a backsplash stops at an open wall end or wraps into a window, a mitred return can replace a metal edge strip. It suits through-body porcelain and stone backsplashes far better than glazed subway tile. Our kitchen backsplash installation service plans edges, outlets, and cabinet lines before the first tile goes up.
Tub aprons, fireplace surrounds, and feature walls. Large-format porcelain or stone wrapped around a tub deck, hearth, or column with mitred corners gives the look of a thick slab without its weight. Vanity tops and waterfall counters in porcelain slab use the same idea, although that work is often handled by a countertop fabricator.
When mitred tile edges are the wrong choice
A mitre removes the trim that would otherwise take the knocks. That trade is worth it on a niche at eye level and much less so in a few common situations.
- Floor-level corners and busy hallways. Base corners, step edges, and mudroom walls take kicks, vacuums, winter boots, and pet claws. TileLetter quotes an installer warning that vacuums can damage mitred edges at the base of a wall. A floor-rated metal profile or a manufacturer step piece holds up far better, and Schluter, for example, positions its JOLLY profile for wall edges while pointing floor edges to a different profile.
- Edges at hand and shin height in family showers. TileLetter notes that mitred materials often leave a sharp edge, which matters most in wet areas where someone could slip. In a shower used by young children or older adults, a rounded profile or bullnose on the curb and bench may be the kinder choice.
- Glazed tile with a contrasting body. A white glazed tile on a red or grey body will show that body at the corner once the point is eased or chipped.
- Walls that are out of plumb or out of square. A mitre assumes a straight, true corner. If the corner bows, or the walls meet at more or less than 90 degrees, the joint opens and closes along its length.
- Corners that are likely to move. Where dissimilar materials meet or framing is likely to shift, a rigid mitre has nowhere to give. One installer quoted by TileLetter warns that movement will probably crack the tile just beyond the mitre point.
- Tight budgets or schedules. Mitres take longer to cut and set, use more tile, and leave less room for error. On a rental or a quick refresh, a well-chosen profile often makes more sense.
Older homes across Waterloo Region deserve a special note. Plaster walls, settled framing, and decades of earlier renovations mean corners are rarely as straight as they look. A mitre in an older Kitchener or Cambridge house often starts with straightening the corner, not with the saw, and that prep belongs in the quote.
How a well-made mitred tile edge is built, step by step
Because no ANSI or TCNA document explains how to make a mitre, quality depends on the installer's own method. TileLetter makes that point directly and advises researching the approach in advance, especially for wet areas. The steps below describe what careful work generally involves; the exact method should suit the tile and the setting materials in your assembly.
- True up the corner. The substrate at the corner is checked with a level and a square, then built out or flattened so it is straight along its whole length. If the walls do not meet at 90 degrees, the bevel angle is adjusted to suit.
- Plan the layout around the corner. The layout is set so a full or near-full tile lands on the corner, grout lines continue around it, and, on veined porcelain or stone, the pattern flows from one face to the other where possible.
- Cut the tile to size first, then bevel it. Rubi, the tile-tool maker, recommends trimming the edge before mitring, cutting with the tile face up and clamped, using a blade made for mitring, and keeping the cut just below the glaze line so the face does not chip. A bridge saw or a cutter with a tilting head gives far more control than freehand grinding.
- Leave a hair of face and ease the point. Many installers stop just short of a full knife edge and then soften the point with diamond hand pads. A small eased edge is less likely to chip and far kinder to hands than a razor-sharp corner.
- Support the corner completely. The bevel leaves very little material at the point, so the tile behind it needs full mortar coverage. A hollow behind a mitre is where chips and cracks start.
- Fill and finish the joint. The narrow joint at the corner is filled with grout, colour-matched epoxy, or another filler that can be finished flush. TileLetter describes a fused mitre, in which colour-matched epoxy bonds and supports the joint before it is shaped and smoothed.
- Protect it while it cures. Finished mitres are guarded for the rest of the job so ladders, tools, and materials do not catch the edge.
Ask your installer how they handle each of those steps. A confident, specific answer, and ideally a sample corner or photos of their own mitred work, tells you more than any general promise about craftsmanship.
What a good mitre looks like up close
You do not need tile experience to judge a finished mitre. Look for these details on a sample corner before the job starts and again before final payment.
- The joint is tight and consistent from one end of the corner to the other, with no section that opens up.
- The two faces meet flush. A step between them, called lippage, catches light and fingers.
- The point is eased. Running a hand along it should not feel sharp.
- There are no chips along the corner, especially at the ends and where grout lines cross it.
- The joint filler matches the tile closely and sits flush, neither proud nor sunken.
- Grout lines carry around the corner, and on a niche they meet the returns cleanly at each three-way corner.
- On veined tile or stone, the pattern carries around the corner where the layout allowed it.
Some variation is normal with natural stone and handmade looks. What should not happen is a mitre that is tight in one spot and gapped a few centimetres away, or a corner that leaves a sharp ridge exactly where people reach for shampoo.
Mitred edges in showers: waterproofing and everyday care
In a wet area, the tile is only one part of the assembly, and a mitre is a finish, not a seal. The waterproofing sits behind the tile and has to be continuous across the niche, curb, and bench before any mitre is cut. The niche box, its inside corners, and the curb are covered by the same membrane system as the walls and floor, so water that gets past a grout joint or a mitre still has nowhere to go but the drain. Our guide to shower waterproofing before tile explains the main options.
Horizontal mitred surfaces need slope. A niche sill or curb top that sits dead level holds a film of water along the joint, while a slight pitch toward the shower lets it drain and dry. That pitch has to be built into the framing or the membrane layer, not made up with extra mortar under the tile.
Care is simple but specific. Clean mitred edges with a soft cloth or a non-abrasive pad, because scouring pads can wear an eased edge and dull polished stone. Natural stone mitres need the cleaning and sealing routine the stone calls for, and the Natural Stone Institute cautions that many stones are sensitive to acidic cleaners.
Water across Waterloo, Kitchener, and Cambridge is hard, roughly 17 to 38 grains per gallon by one regional estimate, so mineral film builds up fastest on sills and ledges where water sits. A quick wipe of niche sills and curb tops after showering keeps the joint looking crisp and saves you from scrubbing the edge later.
How mitred edges change the cost and timeline of a tile job
Mitred edges cost more than trim because they take more skilled time, not because the materials are expensive. Each corner needs extra cuts, test pieces, finishing, and slower setting, and the installer usually needs spare tile to allow for a bevel that chips or a cut that is not quite right. Long mitres on large-format tile or porcelain panels also need two people and careful handling.
Mitres are commonly priced by the linear foot or by the detail, such as per niche or per curb, rather than folded into a square-foot rate. Because the time varies so much with the tile, the length of each corner, and the condition of the walls, there is no honest single number to publish. A fair quote lists each mitred detail separately so you can see what the finish adds and decide where it is worth it.
Mitres add schedule time as well. A niche with mitred returns takes noticeably longer than one framed with a profile, and an epoxy-filled joint needs its own cure time before the area is used. Our tile installation cost guide explains how details like this shape a quote in Waterloo Region.
Questions to ask before approving mitred edges in a quote
Bring these questions to every installer you are comparing. The answers show whether mitres are a routine part of their work or something they will be figuring out on your walls.
- Which edges in this project will be mitred, and which will get a profile or bullnose?
- Is the tile I have chosen glazed, colour-body, or through-body, and how will the corner look once the point is eased?
- What saw and blade will you use, and do you ease the point after cutting?
- How will the corners be straightened if the walls are out of plumb or out of square?
- What fills the mitre joint, and how will its colour be matched?
- How are the niche sill and curb top sloped, and how is the waterproofing carried behind them?
- How much extra tile should I order to allow for mitred cuts?
- Can you show me a sample corner or photos of mitred work you have completed?
- How is each mitred detail priced in the quote?
Photos of the walls, the exact tile you are considering, and a rough sketch of where you want mitres will make those answers far more specific, and far easier to compare between quotes.
What we recommend for mitred tile edges in Waterloo Region
Use mitred tile edges where they will be seen and admired, not where they will be kicked. For most Waterloo Region bathrooms, that means mitred niches, wall returns, and feature walls in through-body porcelain or stone, with a profile on floor-level corners and an eased or rounded edge on curbs and benches in showers that children use. If your tile is glazed with a contrasting body, choose matching bullnose or a profile in a finish that suits the room, or pick a different tile for the mitred areas.
Decide edge treatments at the tile-selection stage, not on installation day, because the decision affects which tile you buy, how much of it, and how niches and walls are framed. Moonka Tiles Co. plans edge details as part of every bathroom tile installation and custom shower, with local service in Waterloo, Kitchener, Cambridge, and Guelph. Send photos of the space, your tile choice, and the corners you are thinking of mitring, and we will tell you where a mitre will look its best and where trim will serve you better.
Frequently asked questions
Is a mitred tile edge better than bullnose or metal trim?
Not always. A mitred edge gives the cleanest, trim-free look and suits niches, wall returns, and feature walls in through-body porcelain or stone. Bullnose is practical for traditional ceramic tile, and a metal profile is the toughest choice for busy or floor-level corners.
Can glazed porcelain or ceramic tile be mitred?
It can be cut, but the result is often disappointing. Glazed tile carries its colour only in the surface glaze, so the body can show as a line along the corner and the glaze can chip at the point. Test a sample corner first, or use matching bullnose or a profile.
Do mitred tile edges chip easily?
A well-made mitre with an eased point, full mortar support, and a properly filled joint holds up well on walls and niches. Sharp, unsupported points chip easily, and any mitre at floor level or in a busy hallway is exposed to kicks, vacuums, and furniture.
Are mitred edges safe on shower niches, curbs, and benches?
They can be, when the point is eased rather than left knife-sharp. TileLetter notes that mitred materials often leave a sharp edge, which matters in wet areas. For showers used by young children or older adults, a rounded profile or bullnose on curbs and benches is often the safer choice.
Do mitred tile edges cost more than trim or bullnose?
Usually, yes. The extra cost comes from skilled labour and spare tile rather than materials, because each corner needs precise bevel cuts, finishing, and careful setting. Mitres are commonly priced by the linear foot or per detail, so ask for each mitred element to be listed separately.
Sources and further reading
Technical claims are checked against the following primary or specialist references. Product-specific instructions always take precedence for the assembly being installed.
- TileLetter: mitering tile and stone, pros and consUsed for: That no ANSI or TCNA document gives guidance on mitres, the NTCA Reference Manual's list of typical mitre locations, sharp edges in wet areas, chipping in high-traffic spots, cracking just beyond the mitre point, fused and quirk mitres, and mitred 8 mm and 12 mm porcelain panels.
- Rubi Tools: mitred tiling step by stepUsed for: The 45-degree mitre cut, trimming the edge before mitring, cutting face up with the tile clamped, using a blade made for mitring, and keeping the cut below the glaze line so the face does not chip.
- Arizona Tile: color body vs. through body porcelain tileUsed for: How glazed, colour-body, and through-body porcelain differ in body colour, and why chipped or exposed edges show more on glazed tile.
- Schluter Systems: JOLLY finishing and edge-protection profileUsed for: Metal profiles as edge protection for outside corners and tile edges in wall applications, and the use of a separate profile for floor edges.
- Tile Council of North America: grout FAQUsed for: Grout-joint width, movement at changes of plane, flexible sealants, discolouration, and maintenance context.
- Natural Stone Institute: care and cleaning of natural stoneUsed for: Cleaning, sealer, stain, and acid-sensitivity considerations when natural stone is considered for a backsplash.
- Water Softener Facts: Region of Waterloo water hardness mapUsed for: Tap water hardness ranges of roughly 17 to 38 grains per gallon across Waterloo, Kitchener, and Cambridge, which affects mineral scale on shower floors.