Porcelain Slab Shower Walls: Pros, Cons and What Drives Cost
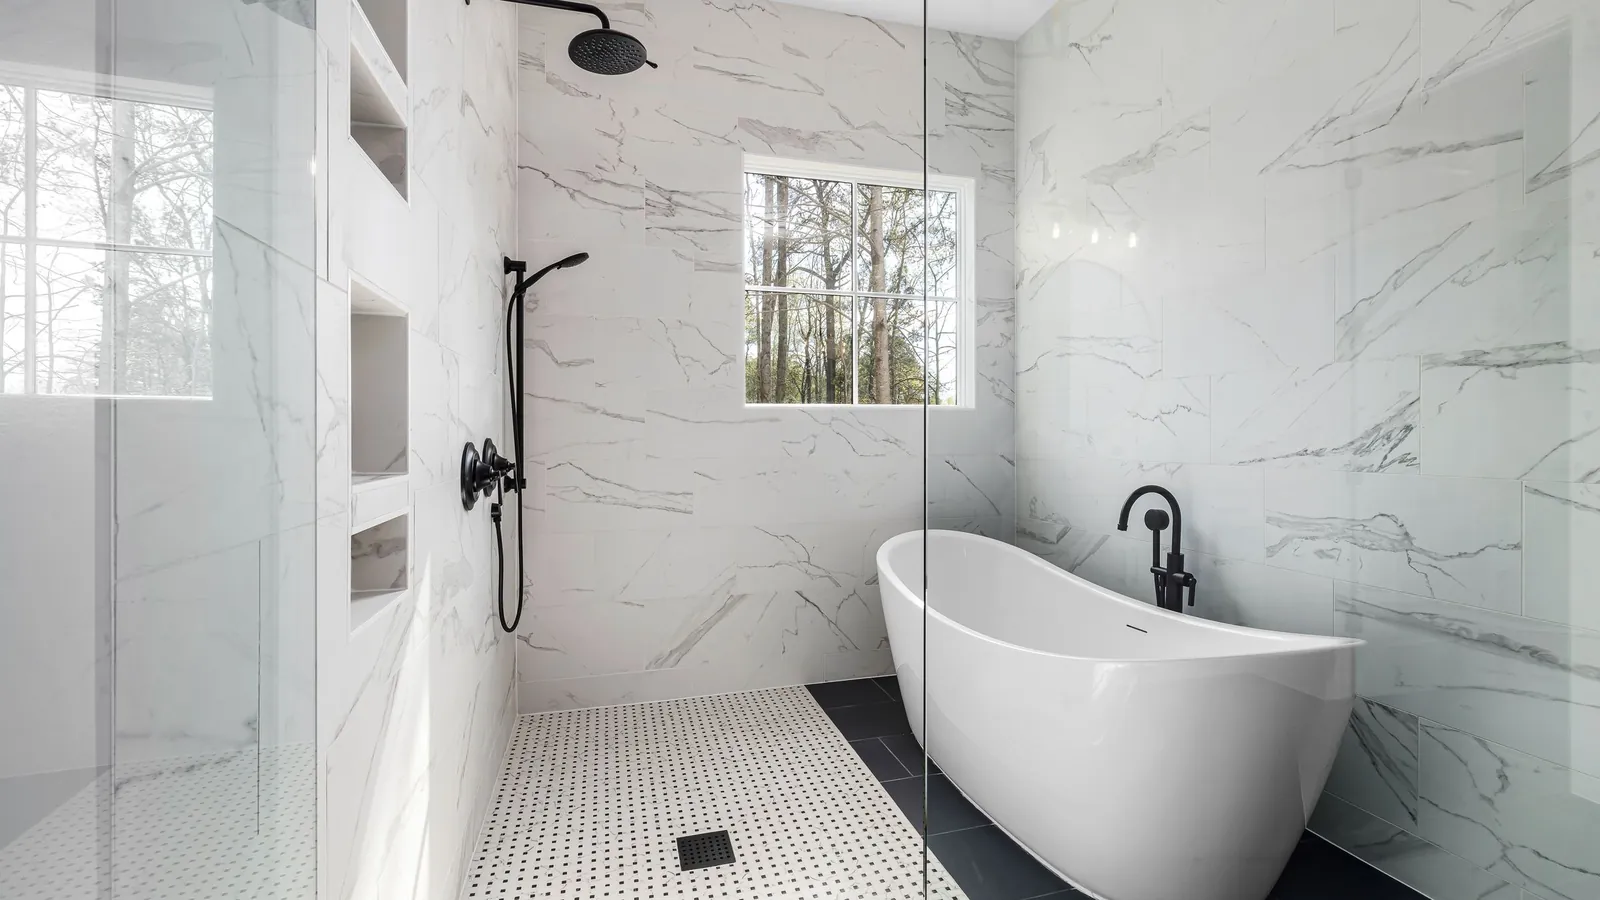
Thinking about porcelain slab shower walls? Compare slabs with large tile, stone and acrylic, and see what installers must get right and what drives the cost.
Key answer
Porcelain slab shower walls trade grout lines for precision
Porcelain slab shower walls use thin, oversized porcelain panels, often one piece per wall or close to it, in place of many smaller tiles. The appeal is a calm, stone-like surface with very few grout joints to clean. The trade-off is precision: slabs need very flat walls, full mortar coverage, careful handling, accurate cut-outs for the valve and niche, and a route into the house they can actually be carried along. Behind them, the shower still needs a complete waterproofing system.
Slabs suit homeowners who want a near-continuous wall and are willing to make decisions early. They are a poor fit when the panels cannot reach the bathroom, when the walls cannot be made flat, or when the budget leaves no room for spare material. Below: what slabs are, how they compare, where installation gets difficult, and what drives cost.
If you are planning a new or rebuilt shower, our shower tile installation page explains how a custom shower is planned from the drain up, whatever finish ends up on the walls.
What are porcelain slabs and panels?
In the tile industry the product is called gauged porcelain tile, and the largest sizes are gauged porcelain tile panels or slabs. The Tile Council of North America's page for the ANSI A137.3 and A108.19 standards defines panels and slabs as pieces of one square metre or more in face area. A137.3 sets the minimum physical properties and grading for the product, and A108.19 sets the procedures and requirements for installing it indoors.
Thickness is what separates slabs from ordinary tile. The TCNA page lists two strength classes: products with a declared thickness of 5.0 to 6.5 mm, assessed for floors, walls and countertops, and thinner products of 3.5 to 4.9 mm, assessed for walls and countertops only. Laticrete's technical data sheet for gauged porcelain on walls notes that these products range from about 3.5 mm to 8 mm, and that some are made with a resin or mesh backing for stability.
That thinness keeps a large panel light enough to set on a wall, and it also makes the panel easy to crack before it is bonded. The panel maker's instructions decide which thickness suits which use, and Laticrete's sheet is clear that not every thickness in a product range suits every application. For a wider look at wall materials, see our guide to types of tile for showers.
Porcelain slab shower walls vs large-format tile, natural stone and acrylic
| Wall option | Joints on the wall | What the wall needs | If a piece is damaged | Watch for |
|---|---|---|---|---|
| Porcelain slab or panel | Very few: often one seam on a wide wall, or none on a narrow one. | Very flat walls, full mortar coverage, handling frames or suction lifters. | Usually the whole panel is replaced. | Access into the room, cut-out accuracy, spare stock from the same batch. |
| Large-format porcelain tile, such as 24 by 48 inches | A joint every two to four feet. | Flat walls and lippage control, with pieces two people can carry up most stairs. | One tile can be cut out and replaced. | More grout lines than a slab, still far fewer than small tile. |
| Natural stone slab | Very few. | Stiff, flat support for a heavy material. | Repairs depend on the stone; matching veining is difficult. | Sealing and care routines that depend on the stone. |
| Acrylic base and wall panels | Few panel seams, plus trim and sealant joints. | A standard alcove size that matches the product. | Depends on the product and the damage. | Fixed sizes and the maker's cleaning rules. |
The closest competitor to a slab is large-format tile. A 24 by 48 inch porcelain tile gives most of the slab look with pieces that fit up a staircase and can be replaced one at a time. Our guide to large format tile trends covers that middle ground in detail.
Acrylic is the prefabricated route to few joints: quick in a standard alcove, but it cannot be cut to a custom room. Our comparison of a tile shower vs acrylic shower sets out cost, cleaning and repairs side by side.
Pros and cons of porcelain slab shower walls
The pros.
- Very few grout joints, so far less grout to scrub and fewer lines for soap film and mildew to settle in.
- A calm, continuous surface where a marble, limestone or concrete look can run across a whole wall without a grid of joints interrupting it.
- Porcelain's density: TCNA's tile initiative notes that porcelain is defined as ceramic tile with water absorption of 0.5% or less, so the face does not soak up water the way many stones can.
- A custom fit: panels are cut to the room, unlike prefabricated acrylic sizes.
The cons.
- Panels have to travel through the house to the bathroom, and some stairs and doorways will not allow it.
- Walls must be flatter than many existing walls are, so preparation is a larger share of the job.
- Cut-outs for the valve, shower head and niche have to be right the first time; a bad one can cost a whole panel.
- A crack, from a dropped tool or building movement, means replacing a panel rather than one small tile.
- Breakage in handling costs more, so waste allowance and spare stock weigh more in the budget.
- The work needs extra hands and equipment, which affects scheduling.
None of these cons rules slabs out on its own. Each is either solved or exposed during planning, which is why slab decisions belong early.
Getting slabs into the bathroom: stairs, doorways and older homes
Before anyone measures the shower, measure the route. A panel of a square metre or more travels on edge, often in a frame, and it has to make every turn between the truck and the shower: the front steps, the hallway, the staircase and its landing, the bathroom door, and the space in front of the shower where it is stood up and lifted onto the wall.
This is where many older homes in Kitchener, Waterloo and Cambridge set the limit. Narrow staircases with a turn at the top, low ceilings over the stairs and tight upstairs halls can stop a panel that would fit the shower perfectly. A basement bathroom brings its own route and ceiling-height questions, which our basement shower guide covers along with drains and waterproofing below grade.
If the full-size panel will not make the trip, there are two usual answers. Panels can be cut into smaller pieces before they go upstairs, which adds seams that need planning, or the design can be chosen in a large-format tile size where the same look is made smaller. Ask the supplier which sizes the design comes in before you settle on a layout.
Handling continues inside the room. Laticrete's data sheet recommends glass installers' vacuum suction cups or installation frames for handling and placing gauged porcelain, to reduce the chance of cracking it. That means two or more people, clear floor space, and somewhere safe to store panels on edge during wall prep.
Why slab walls need flatter walls than ordinary tile
Small tiles can follow a slightly wavy wall because every joint absorbs a little of the variation. A slab cannot. If the wall bows, the panel either rocks on a high spot or bridges a hollow, and in both cases the mortar behind it does not give full support.
Laticrete's data sheet, citing ANSI A108.01, sets the flatness for tile with an edge of 15 inches or longer at no more than 1/8 inch in 10 feet from the required plane, and no more than 1/16 inch in 24 inches. It also calls for framing that meets L/360 deflection under total load. Walls that have been patched over the years, or that once held a tub surround, often need straightening or new backer board to reach that standard.
The backer matters as well. The same sheet lists the backers it supports on framed interior walls, such as cement backer units and certain waterproof boards, and the waterproofing system you choose may narrow the list further. Our waterproofing and tile prep page explains how walls are prepared before any tile or panel goes on.
How a porcelain slab is set: coverage, back-buttering and lippage
Thin porcelain has to be fully bedded in mortar, because a hollow behind a thin panel is a crack waiting for a knock. Laticrete's data sheet calls for notched mortar on both the back of the panel and the wall, known as back-buttering, with the trowel ridges straight, parallel to each other and at right angles to the panel's long edge, unless the panel maker directs otherwise.
It sets a minimum of 85% mortar coverage for interior work, with no void larger than 2 square inches, and points to Section 15 of ANSI A108.19 for the full coverage rules. Coverage can be checked by carefully lifting a freshly set piece, where that is possible, to look at the mortar on its back, and hand-held vibrating pads can help bed a panel fully.
Lippage, the height difference between neighbouring edges, is the other test of a good wall. The TCNA page notes that A108.19 includes lippage criteria and the use of lippage control systems, and Laticrete says mechanical edge-levelling systems help reduce lippage and improve coverage at edges and corners. Where light rakes across a wall, a small step between two panels shows more than it would between small tiles.
Waterproofing still sits behind the slab
A porcelain panel is dense, but it is not the waterproof layer of a shower. Seams, cut-outs and the joint where the wall meets the floor all let water reach the surface behind. A complete waterproofing system behind the panels, connected to the drain, does that job, exactly as it would behind any tile. TCNA's shower FAQ stresses system compatibility and following the instructions of the membrane and setting material makers.
That makes compatibility a slab-specific question: the mortar that bonds the panels has to be approved for the membrane or board it sits on. Ask which membrane is planned, which mortar is approved over it, and how the waterproofing will be tested before any panel goes up. Our checklist on shower waterproofing before tile covers the steps that apply whatever the finish.
Seams, corners and cut-outs: the details that decide the finish
Seams. Even a slab shower usually has joints: where two panels meet on a wide wall, at each inside corner, and where the walls meet the floor or a bench. Plan seams with the design in mind, so veining continues across a joint or a seam falls on a natural line such as the edge of a niche. Laticrete's data sheet notes that thin panels leave little depth for grout, so joints must be cleaned of mortar for their full depth before grouting.
Inside corners. Changes of plane move. TCNA's grout FAQ explains that joints at changes of plane call for a flexible sealant rather than rigid grout, and Laticrete's sheet asks for movement joints to be cleaned out and sealed in line with TCNA's EJ171 detail. Expect a neat sealant line in each corner, and plan to renew it from time to time.
Outside corners and edges. A slab's exposed edge can be mitred, so two faces meet at a crisp corner that reads as solid material, or finished with a metal profile. TileLetter reports that 8 mm and 12 mm porcelain panels are now being mitred, and also cautions that sharp mitred edges in wet areas deserve thought. Our guide to mitred tile edges explains when a mitre is the right call.
Cut-outs. The valve, shower arm, handheld bracket and any light or control each need a hole in the right place on a panel that may span the whole wall. Measure from finished references, mark the panel face, and cut with the panel fully supported. A hole slightly off is hidden by a trim plate; one badly off can cost the panel, so plumbing positions should be fixed and checked before any panel is cut.
Niches, benches and shelves with slab walls
A recessed niche is the hardest single detail in a slab shower. Cutting a niche opening out of the middle of a large panel leaves narrow strips of porcelain around the hole, and those strips crack easily during handling. Two approaches avoid that: place the niche at a panel seam, so the opening is formed between two panels rather than cut from one, or build the panel layout so the niche sits near an edge.
Frame the niche between studs while the wall is open, and size it so its edges land where the panel layout wants them. The inside of the niche is usually lined with pieces cut from offcuts, which lets the veining wrap inside, and its bottom should slope slightly toward the shower so water does not sit.
Benches and ledges raise the same questions: which face comes from which panel, where the seams fall, and how the top is sloped back toward the drain. Settle these on the layout drawing before any panel is cut, since wall offcuts often become the niche and bench.
What about the shower floor?
Slabs are mostly a wall material in showers. A shower floor has to slope to the drain, and a large, rigid panel cannot follow the four-way slope that a centre drain needs. The usual answer is a floor of smaller tile or mosaic, often in a design chosen to match the walls, sloped to the drain.
With a linear drain, the floor can slope on a single plane toward one wall, and Schluter's guidance on linear drains notes that single-plane slopes let large-format tile continue from the bathroom floor. Even then, the floor needs a product its maker rates for wet floors, and the TCNA page lists only the thicker 5.0 to 6.5 mm class as assessed for floors. Our curbless shower guide explains how a single-slope floor and a level entry are built.
Living with slab walls: cleaning, hard water and repairs
Fewer joints means less grout to clean, which is the main everyday benefit. Water across much of Waterloo Region is hard: hardness mapping drawn from Region of Waterloo data puts it at roughly 17 to 38 grains per gallon, varying by area. That mineral film still forms on porcelain, glass and fixtures, so a squeegee after each shower and a mild cleaner suited to porcelain and to the sealant lines keep slab walls looking their best.
Repairs are where slabs differ most from tile. A cracked panel usually means removing and replacing the whole panel, along with the sealant and grout around it, which is far more work than swapping one small tile. Keep at least one spare panel or a large offcut from the same production batch where you can, because shades and patterns vary between batches and designs are discontinued.
Natural stone slabs ask for more routine care. The Natural Stone Institute's guidance covers sealing, staining and the acid sensitivity of many stones, which is one reason stone-look porcelain is chosen for busy family showers. If real stone is the goal, plan its sealing and cleaners first.
What drives the cost of porcelain slab shower walls
Slab showers are priced around the whole job, not the square footage of porcelain alone. The factors that move a quote most are:
- The panels: size, thickness, finish, backing and brand, plus any spare stock you keep.
- Access: stairs, turns and distance from the truck decide how many people the move takes and whether panels must be cut down first.
- Wall preparation: straightening framing and rebuilding backer to slab flatness can be a large share of the labour.
- Waterproofing: the membrane or board system and its approved mortar.
- Details: each valve hole, niche, bench, mitred corner and seam adds skilled time.
- Equipment and crew: frames, suction lifters, levelling systems and extra hands.
- Waste allowance: one broken panel is a bigger loss than one broken tile.
- The floor and glass: a separate tile floor, the drain type, and glass measured after the walls are finished.
This is why two quotes for slab walls can differ widely and both still be honest. Compare what each one includes: who supplies, receives and moves the panels, the wall prep, the waterproofing system, the number and position of seams, how corners are finished, and whether spare stock is left behind.
In a larger bathroom project, floors and transitions are priced alongside the shower; our bathroom tile installation page explains how that work is scoped.
How long slab walls take, and whether you need a permit
In our planning, the tile and waterproofing work on a custom tiled shower commonly runs 5 to 8+ working days. Slab walls change the shape of that schedule rather than simply shortening it: fewer pieces go up, but wall prep, layout and each cut-out take longer, and nothing can be grouted until the mortar has cured. Laticrete's data sheet recommends at least 72 hours at 21°C before grouting, with full cure typically taking 28 days, and longer in cooler conditions.
Lead time matters as much as installation days. Panels may need ordering, delivery may need booking around access, and glass is measured only after the walls are finished. If the new walls are part of a bigger change, such as replacing a bathtub, our guide to a tub to shower conversion covers the other trades involved.
On permits, Kitchener lists tiling and similar finish work as not needing a building permit, while adding or moving plumbing fixtures does. Replacing tiled walls with slab walls in the same layout is finish work; relocating the drain or a fixture is plumbing work that can bring a permit in. Our guide to bathroom renovation permits sets out what each city says; confirm with the city before work starts.
Questions to ask any installer about slab walls
Laticrete's data sheet recommends asking for references and a portfolio with a bid, to confirm the installer has finished work of similar size, scope and complexity, and says interior installations should follow ANSI A108.19. Those two points make good opening questions, and the rest follow from the sections above.
- Have you installed gauged porcelain panels on shower walls, and can I see photos of finished seams, corners and cut-outs?
- Which standard and which maker's instructions will you follow, and how will you check mortar coverage?
- Will the panels reach my bathroom at full size, and if not, where will the extra seams go?
- How will the walls be made flat enough, and what is included in that prep?
- Which waterproofing system and approved mortar will you use, and will the waterproofing be water tested before panels go up?
- Where will each seam fall, and how will the niche, bench and outside corners be finished?
- Who supplies, receives, stores and moves the panels, and who carries the risk of breakage before they are set?
- How many spare panels or offcuts will be left for future repairs?
Bottom line: porcelain slab shower walls reward early planning
Slab walls give a shower a calm, near-continuous surface with very little grout, and porcelain's density without the upkeep of natural stone. In return they ask more of the house and the installer: a clear route for the panels, very flat walls, full mortar coverage, accurate cut-outs, and waterproofing behind them that is just as complete as in any tiled shower.
If the panels can reach the bathroom and the walls can be made flat, slabs are a strong choice for a primary shower. If not, large-format porcelain tile gets most of the look with far fewer constraints. Planning a custom shower in Kitchener, Waterloo or Cambridge? Send photos, measurements and the look you have in mind through our contact page, and we can talk through wall finishes that suit the space.
Frequently asked questions
How much do porcelain slab shower walls cost?
There is no reliable per-wall price, because the cost depends on the panels, how hard they are to get into the bathroom, how much wall preparation is needed to reach slab flatness, the waterproofing system, and every cut-out, seam and corner detail. Waste allowance and spare stock also weigh more than with tile. Compare quotes line by line rather than by total.
What are the pros and cons of porcelain slab shower walls?
The pros are very few grout joints, a calm stone-look surface, porcelain's density and a custom fit to the room. The cons are access through the house, very flat walls, cut-outs that must be right first time, panel-sized repairs if one cracks, and more equipment and hands to install. Most of the cons are settled during planning.
Are porcelain slabs better than tile in a shower?
Not automatically. Slabs win on joint count and a continuous look, while large-format tile such as 24 by 48 inches gives a similar effect, fits up most staircases and can be repaired one piece at a time. Smaller tile is easier on uneven walls and on sloped floors. The right choice depends on access, wall condition and how you clean.
How thick are porcelain shower wall panels?
Gauged porcelain panels are thin. The TCNA page for ANSI A137.3 lists two classes: 3.5 to 4.9 mm, assessed for walls and countertops, and 5.0 to 6.5 mm, assessed for floors, walls and countertops. Laticrete notes products range up to about 8 mm, some with a resin or mesh backing. The panel maker says which thickness suits your use.
Do porcelain slabs need waterproofing behind them?
Yes. The panel face sheds water, but seams, cut-outs and the joints at corners and the floor let moisture reach the wall behind. A complete waterproofing system connected to the drain is still required, and the mortar that bonds the panels must be approved for that membrane or board. Ask how the waterproofing will be tested before panels go up.
Sources and further reading
Technical claims are checked against the following primary or specialist references. Product-specific instructions always take precedence for the assembly being installed.
- Tile Council of North America: 2025 tile initiativeUsed for: The industry definition of porcelain tile as ceramic tile with water absorption of 0.5% or less.
- TileLetter: mitering tile and stone, pros and consUsed for: That no ANSI or TCNA document gives guidance on mitres, the NTCA Reference Manual's list of typical mitre locations, sharp edges in wet areas, chipping in high-traffic spots, cracking just beyond the mitre point, fused and quirk mitres, and mitred 8 mm and 12 mm porcelain panels.
- Tile Council of North America: shower installation FAQUsed for: System compatibility, shower substrate, membrane, backer-board, and manufacturer-instruction considerations.
- Schluter Systems Canada: showers with a linear drainUsed for: Linear drain placement against a wall or at intermediate floor locations, and single-plane shower floor slopes that allow large-format tile to continue from the bathroom floor.
- Tile Council of North America: grout FAQUsed for: Grout-joint width, movement at changes of plane, flexible sealants, discolouration, and maintenance context.
- Water Softener Facts: Region of Waterloo water hardness mapUsed for: Tap water hardness ranges of roughly 17 to 38 grains per gallon across Waterloo, Kitchener, and Cambridge, which affects mineral scale on shower floors.
- Natural Stone Institute: care and cleaning of natural stoneUsed for: Sealing, staining and acid sensitivity of natural stone, and cleaners suited to stone surfaces.
- City of Kitchener: when you need a building permitUsed for: Kitchener's permit list: adding or moving plumbing fixtures, finishing a basement, removing a load-bearing wall, and re-insulating need a permit; replacing a toilet, bathtub or sink in the same location, tiling and similar finish work, and removing a non-load-bearing wall do not; the city does not review or inspect electrical work.
- Tile Council of North America: ANSI A137.3 and A108.19 for gauged porcelain tile and panels/slabsUsed for: Panels and slabs defined as one square metre or more in face area; strength classes for 5.0 to 6.5 mm products (floors, walls, countertops) and 3.5 to 4.9 mm products (walls, countertops); A137.3 covering physical properties and grading, and A108.19 covering interior installation, substrate requirements, lippage criteria, lippage control systems and coverage criteria.
- Laticrete: TDS 170W, installing gauged porcelain tiles and panels on wallsUsed for: Product thickness of about 3.5 to 8 mm with optional resin or mesh backing; vacuum suction cups or installation frames for handling; ANSI A108.01 flatness of 1/8 inch in 10 feet and 1/16 inch in 24 inches for tile with an edge of 15 inches or more; L/360 framing; mortar on both panel and wall; at least 85% coverage with no void over 2 square inches; edge-levelling systems; 72 hours at 21°C before grouting and full cure in about 28 days; clean grout and movement joints; references and a portfolio from installers.